iOS Today 650 Transcript
Please be advised this transcript is AI-generated and may not be word for word. Time codes refer to the approximate times in the ad-supported version of the show.
Mikah Sargent (00:00:00):
Coming up on iOS today, Rosemary Orchard and I are going to show you some photos, tips, and tricks for your iPhone, your iPad, and well every Apple device you own. Stay tuned
(00:00:14):
Podcasts you love, From people you trust. This is TWiT.
(00:00:23):
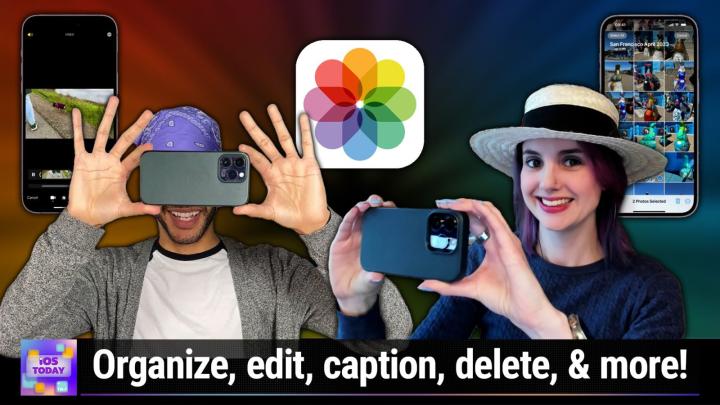
This is iOS today, episode 650, recorded Tuesday, April 18th, 2023. iOS, photos, tips, and tricks. This episode of iOS Today is brought to you by Delete Me, reclaim your Privacy by removing personal data from online sources. Protect yourself and reduce the risk of fraud, spam, cybersecurity threats, and more by going to join delete me.com/twit and using Code TWiT for 20% off. And by CacheFly. CacheFly is the only CDN built for throughput. Delivering rich media content up to 10 times faster than traditional delivery methods and 30% faster than other major CDNs. Learn how you can get your first month free at CacheFly.com. Welcome back to iOS Today, the show where we talk all things iOS, tv, os, home, pod, os, watch, os, iPad os, and all of the OSS that Apple has and provides to you as part of your device purchases. This is the show where we do our best to help you do your best with these Apple devices. I am one of your hosts, Micah, Sergeant, and
Rosemary Orchard (00:01:38):
I am Rosemary Orchard. Uh, sadly back in the uk, not in the studio right next to you, Micah, but you know, we're, we're still here to record. We're gonna have fun anyway.
Mikah Sargent (00:01:47):
Yes. Uh, folks, if you did not catch last week's episode, I absolutely recommend it because Rosemary was in person in the TWI studio in Petaluma, California. Uh, Rosemary flew over to join me for Ask The Tech Geeks, which is a special episode of Ask the Tech guys as well as iOS today, and then later that day, Mac Break Weekly. So it was a great, uh, couple of days or a few days with Rosemary Orchard. So much fun. And yes, we are all back in our respective locations. I'm coming back to you from my, uh, home studio, but, uh, we're still gonna have some fun today and I love that. Uh, our time together tends to inspire, uh, new episodes. And we today are talking about not just sort of the, the camera, um, and what the camera provides, but sort of looking deeper into what's possible in the Photos app itself. Because the Photos app is jam-packed with lots of functionality and honestly, sometimes people miss some of the functionality that is provided there. So let's kick things off, uh, with sort of a basic understanding of what you can do in the Photos app on your iPhone or your iPad.
Rosemary Orchard (00:03:05):
Yeah. Um, and I actually just want to start with a little one that I've just been doing right now. Cause I was like, you know what? I should add all my photos from San Francisco into an album. And so I went to select, but you know, one, you're doing a multi-select, most people will go and they'll tap on the edit and they'll tap, tap, tap, tap, tap to try and select photos. But did you know if you actually pick one of them and then you just kind of move your finger in like a swipe gesture, then you can just keep on sliding and it will auto select everything that you've selected. And then if you get to some that you're like, okay, I was taking this picture because it was just like something I needed to remember, you can pause and then continue onwards. And I just think that that is a great little way of, uh, you know, speeding up your selection as you go. But on top of that, folks, you can pinch and zoom in and out so that you get bigger and smaller previews as needed. So if you wanna have like five photos across in your photos preview, bam, well zoom out a little bit and you'll be right there.
Mikah Sargent (00:03:59):
I, yes, I love this tip because this is one tip where when I share it with folks, it's an eye-opening moment for them. They go, what? I didn't know I could do that <laugh>. I didn't know I could select multiple photos. And, and you just feel very magical as you are showing them this easy process of, of selecting multiple photos and, uh, you know, making edits on them or, or, or adjusting them however you need to. Now, uh, of course that, that is kind of the, the base way to select and to zoom or rather, uh, scroll around through photos, especially with that feature to zoom out so you can quickly move between years. Uh, but what's, uh, what's the next tip we have about the Photos app?
Rosemary Orchard (00:04:42):
Well, the next tip that I was gonna recommend to Fox is, you know, when you're viewing a photo, and I'm just gonna pull up a photo here so that I can, uh, show Fox, uh, what I mean, and it would help if I actually went to the album section. Um, then, um, what you can do is, um, you can actually just when, when you tap on a picture, so I'll just, uh, scroll towards the end of my trip and, and pick something there. There we go. Uh, this was breakfast I had on one of my last days. Um, when you're looking at the picture, there's a bunch of information right here for you on this screen. Um, so you've got the fact that it was taken using portrait mode in the top left, um, and then you can also see the time and location that it was taken at.
(00:05:20):
Um, and then at the bottom obviously you've got a little heart and then there's an eye. Now if I were to, uh, take a look at another picture, um, and I'm gonna have to try and find one quickly with, uh, something useful in, there we go. So this is a picture of Lily. She's a lovely dog, uh, who belongs to, uh, Burke or Owensburg perhaps. Either way, she was in the studio while I was there. This info button here at the bottom has got a little star on it. Um, and that is actually because when I tap on that, it'll show me that it's a dog, um, in the picture and yeah, I know that. And then here did you know, you can add a caption, so I can actually specify in the caption that this is Lilly. Um, and then in brackets I could write Berk stock.
(00:06:04):
Um, and now you can only add a caption to one picture at a time. You can't bulk, um, do this. But this is particularly useful if you've got lots of pictures of dogs, for example. So when you search for it Lilly, you actually want to come back up later, um, so that you can actually find her. Now, if an image was taken at a particular time and maybe the date and time is wrong on it, then you can actually adjust that information here and, um, change that. Um, and similarly there's location as well. So what I'm actually gonna do is I'm gonna go back and I'm gonna look and see if I can just find a picture. Now I need to find the album that I was saving things into because I have a bunch of photos which were actually saved, um, from my D G I mimo, the, um, or D G I Osmo, sorry, I should say the, uh, camera that I have with me last week, which moves, uh, which moves around automatically.
(00:06:55):
Here we go. So, um, uh, this is a picture that I took using that D G I Osmo, and if I tap on this, then I can see, um, well that one's an older picture, but maybe if I scroll forward, then I can get you a nice panoramic shot that I took or one of the others. Um, and so there we go. That one is a panoramic. And what I can do instead of, uh, tapping on the edit, like I did just there, can actually add a location and just type in San Francisco, for example. Um, and then you can actually set this. So if something doesn't have that information, you can manually go back and add that later. And similarly, I can adjust the date and time, um, of the photo to something else. So this was taken on Tuesday, um, at, uh, probably what, uh, 1635 and the time zone, you can even set that too, so I don't need to translate it mentally at eight hours. Um, though it did subtract eight hours for me automatically. Um, and so now I have that information and it's all correct, look at that. Brilliant. Um, and it'll even tell you what app it's come from. So there are a lot of things that you can do in just this little information section from one picture. And, you know, isn't that really nice to be able to, you know, say, oh, this picture that I took on a not so smart actual camera has a location and everything attached to it too. Yeah, I really like that.
Mikah Sargent (00:08:18):
Yep. I love, you know, I, you don't think of it at least, I don't think of it in the moment. I think there are some folks who do, but, um, when I am searching for photos in the photos app, being able to go, that happened at this location, you type that in. And for me what's really awesome is being able to see photos over time that were taken in or near that location. I've had some real blasts from the past in, uh, you know, typing in a specific location, looking for a photo, and then as I'm scrolling through I go, oh my goodness, I forgot about this, I forgot about this. So it's kind of fun from time to time to just type in, uh, a location and see what happened there at one point or another. Um mm-hmm <affirmative>. So it's valuable again, whether you're taking the photo with a device like your iPhone that has that location information embedded or you're taking it with another, uh, device where you can then add a location. It really, I think is worth, uh, doing and, and seeing how it works because it looks, um, or it, it rather, it, it works so well and it does lead to these joyous moments of, of little reminders of the past.
Rosemary Orchard (00:09:33):
Yes, exactly. Um, and I just wanted to show folks as well. Um, if I, uh, don't tap on the wrong thing, um, then what I can actually do is I can, if I type in here, I can just type San Francisco, um, and then it'll pop up and if I just tap search, then it'll search for San Francisco and then I can also search for 2023 and look at that. It gives me the option then to narrow it down to 2023. I could even narrow it down further to say Pier 39, but then I can see the 624 photos and videos that this thing has taken in this time and year, um, uh, or this place and year. Um, and you can get, uh, uh, more granular than that. You can say April. Um, so it's just photos that were taken in April. So if you went to San Francisco twice in the year, um, then you could narrow that down. Um, and that is just, you know, it's really nice. It's even suggesting Easter, um, though I'm guessing it's only picking the pictures that were taken on the Easter weekend or day rather, um, the Sunday rather than anything else.
Mikah Sargent (00:10:29):
Yes. Um, alright, I think, um, we should take a quick break and then we'll come back with loads more about the iOS, uh, photos app, the I iPad OS photos app as well, uh, with some tips and tricks there. But I do wanna tell you about Delete Me. We're bringing you this episode of iOS today. Have you've ever searched for your name online and thought, oh, not too keen on having all of that personal information available there. Maybe it made you feel kinda exposed or unsafe. Well, delete me is a way that you can deal with that. Since 2010, delete Me has been on a mission to empower individuals and organizations by allowing them to reclaim their privacy and help them remove personal data from online sources. Their team is driven by a passion for privacy and a commitment to making it simple for customers to use.
(00:11:28):
See, delete Me helps reduce the risk from identity theft, from credit card fraud, from robocalls, from spam, from cybersecurity threats from harassment, and just from unwanted communications. Overall, delete Me is the most trusted privacy solution available. It helps thousands of customers remove their personal information online. This is kind of wild, some, some little stats here. The average person has more than 2000 pieces of data about them online and Delete Me can find them and remove them. Think about how much time that could save you, delete Me has removed more than 50 million pieces of data for their customers and, uh, one of their customers said, uh, I signed up and they took it from there. Awesome service. Already seeing results. Uh, I delete Me, has actually sponsored a podcast of mine in the past to the Clockwise podcast. And I remember, uh, at the time they sent me a code to give it a go.
(00:12:26):
And I'm an extremely online person. I have, you know, this sort of, uh, online presence that I'm looking to maintain, but I have lots of family members who do not want to be online and do not want to appear online. And so I was able to use that code to help them remove their presence from online to, to get some of that data off of the internet. And it was kind of wild. I, uh, went to Delete Me's site. I, you know, filled out everything, um, put in their information and they kept me updated with what was going on, and they let me know sort of where that information had been taken. Now, when I type this family member's name into different search engines, I can't find anything on them. They're very happy. I was impressed. Delete me is really cool. So if you're going, okay, well how does this actually work?
(00:13:18):
You sign up and submit some basic personal information. Obviously you need to give, delete me the information so that they know what they need to go and find, and then, uh, they can remove it from search engines. Uh, by going to join delete me.com/twit, then delete me. Experts will find and remove your personal information from more than 580 data brokers, helping reduce your online footprint and keeping you and your family safe. Once the removal process starts, you're going to receive a detailed Delete Me report within seven days. So essentially, as soon as you get this underway, they are letting you know, Hey, here's what we found so far. Here's what we're looking into. Here are the possible places where your information is stored, and it doesn't stop there. After that first seven days, delete me continues to scan and remove your personal information every three months with automated removal opt-out monitoring, they will ensure records don't get repopulated after they've been removed.
(00:14:18):
So it says, Hey, we asked you to remove that. We want it to stay gone. Thank you very much. This includes names, addresses, photos, emails, relatives, phone numbers, social media, property value so much more. As the data broker industry expands, it, contracts, it morphs, changes its ways of, of, of business. Uh, delete Me continues to add new sites and features to ensure their service is both simple to use and effective in removing personally identifiable information. And since privacy exposures and incidents affect individuals differently, their privacy advisors ensure that all of their customers have the support they need when they need it. So protect yourself and reclaim your privacy by going to join delete me.com/twit and using the Code TWiT. That's join delete me.com/twit with a code TWiT for 20% off. And of course, we thank, uh, delete Me for sponsoring this week's episode of iOS Today.
(00:15:21):
Head there, check it out. It's well worth it. Alright, back from the break. And we are talking about iOS photos, tips and tricks. These are little, um, tidbits that you may or may not know, uh, for the iOS iPad OS Photos app because it is a full featured, uh, packed app that has lots of different settings, different options, and different add-ons that make it all the better and make it all the more powerful. Um, let's talk about, so we've talked about sort of looking through your photos by location. We've talked about how you can select multiple photos, how you can add information to them, um, with location information. Let's talk about how I get rid of photos or I, uh, hide photos. So I have a little photograph here, uh, when Rosemary Orchard was visiting. And so we are, uh, walking along the road in Central Petaluma according to the Photos app.
(00:16:25):
And maybe I find a photo that I don't want anymore. It is as simple as, uh, tapping on the photo so that the, the UI is displayed at the top and bottom of the screen. And then tapping the delete button in the bottom right hand corner, it looks like a trashcan icon, but maybe you don't want to delete the photo. Maybe you actually want to, uh, keep the photo, but you just don't want it visible. Instead of tapping the trashcan icon, we hit my favorite button, the three dots for more, which is in the top right corner. And we have some options here. One, if we maybe wanted to keep this, uh, photograph, but we wanted to sort of edit one version of it, I would tap on duplicate. That would allow me to, uh, have two versions of the photo and then make a, uh, make changes to one and not the other.
(00:17:20):
Of course, if you're doing edits within the Photos app, then those edits are going to be, uh, revertible. Um, I can copy and you probably going, why is there a duplicate option and a copy option. Well, duplicate will actually physically make a duplicate of the photo right there in your photos. Library copy works a lot like copy on any other platform. So copying the photo doesn't make a duplicate within the Photos album, but instead sort of grabs it and puts it on the Pasteboard, um, that is part of the system so that then I could go into the Photos app, for example, and paste or go to a document and paste. Uh, Hyde will, well actually that's the one I'm gonna get to the, at the end, a slideshow is going to start a slideshow involving this photograph and many others Save as video, uh, because this is a live photo and we'll talk about live photos in a minute.
(00:18:12):
It has a little video file as part of it. So by choosing Save as video, it will allow me to, um, basically extract the video that is built into this and save it separately. Um, add to album, Rosemary talked about that, adding it to an album, adjusting the date and time. If it looks like for some reason this is more applicable to photos that were taken with a different camera, um, the adjust date and time and adjust location, uh, or if you don't want, um, sort of more detailed location information, you could always adjust the location to a more general thing like Petaluma as a whole and then feature a person less. If I tap on that, what it will do is it will tell the system that when it is making choices of what photos to show me, uh, in widgets and in the special, uh, tab that has different slideshow and um, different sort of highlighted photos, I can say, Hey, I would like to see Micah Sergeant Less whenever I am, uh, seeing featured photos.
(00:19:17):
Now, the one that I mentioned that I did not, uh, choose yet is Hide. And Hide is a way to take a photo or photos that you don't want displayed, um, in your photos library, but that you would like to keep. So these may be photos that you just want to keep private or, uh, for the, in the case of iOS today, whenever I'm showing a lot of photos on screen, I like to select screenshots that I have in my Photos library and hide those temporarily because I get in the way as I'm trying to show sort of a photo library. So, uh, by tapping on Hide, it will put it in a special Hidden Photos album. And as of the latest version of iOS, you are able to, um, password protect that Photos li or the rather that Photos album. So the Hidden Photos album is actually locked and is, uh, then only visible by face ID or touch ID or typing in your passcode, uh, once again, depending on what, uh, version of, of iPhone or iPads you are running. So, uh, that is an easy way to quickly go through and keep the photos, but just make them so that they're not visible as you're scrolling through the photo library. Uh, anything you want to add to that or, uh, I'm, I'm ready for your next, uh, tip or trick.
Rosemary Orchard (00:20:44):
Well, what I was gonna say is actually if you do the same sort of thing, but from inside of an album, so I'm here in my San Francisco album, um, and then, you know, I'm just gonna scroll down and I'm gonna look for a picture and I'll peg this one. Uh, and that's Lily looking super cute in her dog basket for anybody who is, uh, not currently looking at the video. So you may, if you can check, wanna check that video out. Um, what I can do from the picture, if I tap and hold on it, then obviously I can copy it and copy edits and share it and so on, which Micah has already talked about it. Um, but I can also go back and show this in all photos. So I can see this within my entire photo timeline as, um, as, as a photo I can add it to an album, but I can also make it the key photo of this album.
(00:21:27):
Um, and if I do that, then when I go back into the album section, then look at that, I can see Lily right there. Um, and then if I, uh, actually, uh, if I just scroll to the top, I, I was, uh, looking for something that I thought was right at the beginning, but of course it's gonna be a bit further down and I can go back and actually set that picture of Micah, um, or the, one of the three of us actually to that. But what you can also do, if you are here and you want to actually remove a picture from an album, oops, I'm not trying to rearrange the pictures in my album. I was just getting a little over excited here. Um, then what I can do, if I tap on delete, it will give me the option to delete this photo, but it should also give me the option to remove it from this album.
(00:22:07):
Um, so if you tap on the delete from the individual view and what I also love here, okay, this is a live picture I took of a tram, um, just sort of pulling in. If I change that at the top, if I tap on live, I can change it into a loop. Um, and so then it will just loop continuously, um, when I tap and hold on it. Um, and, uh, or it will do, there we go. And then it's zoomed in. Um, and then there's also bounce. Um, and then there's another one, which I think may work here. We'll see if it does long exposure. There we go. Long exposure. Um, it's great for things like water, but it's kind of fun for things like motion as well, because what you can do is, uh, have like the, in, in my case, because the tram is moving from the left to the right, it's kind of got a blur effect behind the tram going from the left to the right.
(00:22:48):
I think I'll just stick that back to being a regular old live photo. But that's, you know, that's a pretty nice little thing that you can do there. Um, and if I had a picture that I'd taken using portrait mode, which I'm pretty certain, there was a photo of breakfast somewhere near the end that I took using portrait mode. Um, then when you tap on the edit there, um, you can actually change your portrait mode options, um, as well, so you can change it. So it was taken using natural light, I could change it to studio light or, um, I could change it to, uh, I can't tap on the options. Uh, there we go, stage light, uh, stage light, mono, um, hiking mono, and there we go. So I'm gonna try, I'm gonna try stage light, see what that looks like, and you can easily change this back at any point later if you want to.
(00:23:28):
Um, so that's, you know, quite nice to be able to change this stuff after the fact. I know what my dad used to try and do whenever he'd take pictures of me and my mom, he'd use portrait mode and he'd take one with the regular and one with each of the different filters. Um, and, uh, yeah, then we'd, we'd be there and our, our expressions would go from being fairly happy to a very fixed smile on your face by the end of it, because it, it would take a while to go through all the filters. Just take one picture in portrait mode, and if you're happy, stop right there and enjoy the fact that you can change things later.
Mikah Sargent (00:23:58):
Nice. That is nice. That's a good tip too. Um, all right, let's see. Um, let's talk about taking video on the iPhone or your iPad and some of the adjustments you can make after the fact. So, uh, depending on what, how you're shooting, if you're just shooting a basic video, then the video will of course, uh, be available to edit afterward by trimming the start and the stop of the photo, or excuse me, of the video, of the clip. But if I have certain kinds of video like slowmo or cinematic, uh, video, then that video has some special editing properties for Slowmo. I can choose a portion of the video that I want to actually be in slow motion and the rest of the video, of course, being in, uh, full speed. And let me actually, I know I've got, um, a video that I shot somewhat recently.
(00:25:04):
Uh, that's another great thing about the, uh, photos app is that below the, uh, the, the main albums there are media types. And so you can easily go through and find, uh, special types including slowmo video, cinematic video bursts, screenshots, et cetera. Uh, so I'm going to find a Slowmo video I shot as I was trying to capture. I noticed that my, um, dog, she, uh, has kind of a special trot that she does. And so her, um, way of trotting was unique and I wanted to seated slow Moha just so I wanted Dece SL just so I could kind of, uh, figure that out. So I shot some video in Slowmo and Pro tip. Um, if you are shooting video in Slowmo, do everything that you can to make the, uh, the, the place where you are taking this video as bright as possible.
(00:26:03):
So this is outdoors during the day where you're getting sunlight, direct sunlight, uh, or even indirect sunlight. It's very bright, and that is because, uh, due to the way that Slowmo video is shot, it will, uh, it, it needs as much light as possible. So if I tap the edit button in the top right corner, you will see, uh, down at the bottom of the screen all of these very small lines, and these lines are very close to one another, uh, and it's below the video, but towards the end of the clip, the lines are spread out more than they are in the, the first part of the, the sort of clip. So the parts where the lines are spread out, that is showing you that that is the part where I actually want the video to slow down. So right here at the end, uh, and as I play this back, you'll see that the movement is normal, and then right at the end it starts to slow down as you are seeing, uh, the dog also slow down and continue to move along.
(00:27:08):
So this is showing, um, that, that part of the video is slowmo. Now, to decide what part gets to be slowmo, it's as simple as tapping and dragging. You'll notice that below the clip once again, uh, there are two lines that are a little bit taller than the rest of the lines. If I tap and hold on that line, I can take and drag that line, um, left or right, and that will allow me to choose what part of the video actually gets slowed down so I can drag it back and I'll take the end there and also drag that one back as well. And that will help me too. Well, if it'll, now it's, uh, so there we go. Um, then I can choose to have just a few seconds, uh, of the video actually slow down, and then if I cut back, you'll see that it's moving, uh, quickly with the dog, and then all of a sudden it slows down, uh, as she sniffs something on the, along the way of the path and then continues to move forward. So this is kind of one of those, um, adjustment options where you have to do it within the, uh, photos app in order to make changes to the Slowmo video that is, uh, in that you've shot with a camera. Now what about cinematic mode, Rosemary?
Rosemary Orchard (00:28:37):
Well, cinematic mode is one of those things that I personally have never really ended up getting the hang off just because I don't and tend to end up filming things in a cinematic mode. But the edits work in much the same way. And one of the things I did actually want to show folks, um, uh, that you can do using, um, the video things is, uh, have you ever taken a video of something you're like, great, I've got a little video here. Perfect. And then you realize, oh wait, there's like a truck going past or something, and you don't actually care about the audio, you just care about the picture. Okay, so I've got this little video that I took of a self-driving car, um, that I saw in San Francisco. Okay, so I've got, you know, self-driving car, but you know, there's a bunch of cars around, um, and so on.
(00:29:23):
So when I tap on the edit, there's a little speaker in the top left if you just tap on that removes the audio, the audio is still there in the file, but it's not gonna be played when you listen to it or watch this rather. Um, and then also when you go and you tap on the share and you go to send it to Micah or whoever you want to send it to, um, then it's not gonna show up as, or it is not gonna be present. And this is really handy when sharing it to people on other platforms. Um, so yeah, this is a, a great thing to do. Um, and we've also, Micah just had a question from the club to Discord about burst photos because trying to pick what to do with the burst photo, that's kind of tricky.
Mikah Sargent (00:30:00):
Yeah, so with burst photos, you are essentially taking, um, multiple photos at once. And then what, um, iOS allows you to do is when you take these multiple photos, um, you can kind of choose which one you want to keep. So let me, um, switch my camera here. Uh, so I have a, we'll go with this, uh, little bottle I guess of, of Tahe and to take a burst photo, I simply, uh, tap and hold on the photos button. Oh, no, wait, I forgot they've changed it now. Um, yeah,
Rosemary Orchard (00:30:38):
So this is a, a thing that you have to enable in settings now because what used to happen when you tapped and held on the, the photo, uh, button to take a picture, or if you, um, tapped and held on the volume up button, that can also take a picture while you're taking a picture. Then it would automatically do burst photos. Now it changes to video, um, and that's usually what people want. Um, but you can change this back in the settings, which I'll let Micah show you.
Mikah Sargent (00:31:05):
Yes. So I have launched the Settings app, and then just so that everybody can kind of see how this works, I launched the Settings app, I scroll down, I go into, um, camera, which I've just, did I pass it? Uh, there it is camera. And then where there's the option use volume up for Burst, you turn that on. So then let me go back to the camera. And once again, I've got the Tahe here, and the reason why they set up this feature with video is because, uh, folks were ending up, you know, they, they may be going to take a photo and then realize, oh, this will make for a great video. Having to switch over quickly to video is hard to do. But here now I can, um, I'm, I have my thumb placed on the volume up button, and if I tap and hold or other, if I click and hold on the volume up button, then it will take a burst and it took a burst of 15 photos there.
(00:31:55):
Uh, so now I've got 15 photos of this tahe, and what I want to do is I want to select the photo I want to keep. So in this case, your, the idea with a Burst is one of the photos that I'm taking within this period of time is going to be a really good shot. This is great for if something is moving, not like a s a a solitary and static bottle of s of Tahe, but something like, you know, your dog doing something cute. Um, so you tap and to hold that button on the side, it takes a burst photo. And then down at the bottom, actually, I'm gonna say up at the top in the, uh, top left corner, you'll see a, a label that says Burst, and then parenthesis. It says how many photos it was, 15 photos down at the bottom.
(00:32:40):
What I want to do is choose select. When I choose select, I will see the entirety of these 15 photos. And what's great about this is iOS will select of those burst photos, the one that it thinks is the best based on lighting, based on movement, based on all sorts of little, uh, measurements. And I go ahead and I swipe through and I find the one that's the best. Um, the one that iOS thinks is the best will have a little dot underneath it. And if you have a phone that supports it or a device that supports it, it's typically an iPhone as an iPad does not have, um, a, uh, haptic or a haptic engine in it. Then you'll feel as you move to the select photo, a little bump underneath, um, within the phone. And so that lets you know, hey, this is the one that they think is the best or that the system thinks is the best, but maybe you think that a different one is the best, or maybe you want multiple, maybe, uh, the dog has a goofy tongue out in one photo and the other one looks like it's smiling.
(00:33:41):
You can, uh, while you're in this, this select mode, tap and select multiple photos. So I got that one towards the beginning. I've got the middle one, and maybe there's one toward the end. Oh yeah, that one's great. Then we tap done in the top right corner and it asks, okay, you've selected three photos from your burst. Do you only wanna keep those three favorites or do you still want to keep everything I'm gonna choose keep only three favorites. And then now it's got the original burst. Um, or rather, no, that's, that's the, uh, the video that was taken as part of the live photo, and then it has the three that I actually selected. So it gets rid of that, uh, 15 burst photo file and just gives you the three, uh, bursts that you chose. And then, because I had live photos turned on, it also saved that live photo that was taken, just so you have that as well. So yes, if you've got bursts in your library, um, it's not a bad idea to go through and pick your favorite, so you can save a little bit of space, um, by not having multiple photos that are there.
Rosemary Orchard (00:34:50):
Yes, I am just gonna take a quick detour from photos because something that you did there, Micah, where you took a video instead of burst photos, reminded me that getting a single shot out of a video, it's kind of difficult to do on iOS. So I'm gonna make a recommendation for a free app called Frame Grabber, um, which, um, you can select specific albums. Um, you can filter to just show videos or include live photos as well. If maybe you want multiple pictures out of a live photo, you can get that. Um, and then what you can do is you can actually just grab, um, something. So, uh, from, from that, so, um, I have this video of the seals, uh, or the Sea Lion, sorry, at San Francisco at the pier. I've played it to the right bit. I cl I've, um, you know, the gone, this is the frame that I want, and then I can just tap and it'll do, there's a little, uh, sort of, uh, square box with a down arrow in it, and I can just save that, that single shot. So if you've got a video that you accidentally took because you were trying to do burst photos, here's how you can rescue those stills from that. Um, and that's free Frame Graber on the App Store.
Mikah Sargent (00:35:51):
Nice. Uh, let's talk about live photos, because we did briefly. I think that's kind of what inspired this almost. We briefly talked about live photos and we know that, um, live photos have special features built in where you can, uh, change from, from, uh, how the photo is displayed. And I mentioned in the past, live photos have resulted in some of my favorite little gifs, uh, that I have, because depending on which, uh, form you use, you will get a great photo. And, um, live photos is essentially a video and photo all put into one, um, one package. So here, um, I have a photograph of me, um, ziplining and, uh, this just looks like a static photo of me in front of a bunch of, um, second generation redwoods. Uh, and this is, you know, on its own just the photograph, but what you don't get, um, from the context here is that it looks like I'm ziplining away, right?
(00:37:02):
It looks like I'm going toward the other side of the zip line, but in fact, what is happening is as I was ziplining across the longest zip line in northern California, um, a gust of wind hit me from the side, uh, as I was going across. And, uh, when that happens, you have to try to correct your body so that you don't start spinning around on the zip line and when you, when you correct for it, it sort of slows things down a bit. So I had reached nearly the end of the zip line when I came to a, uh, complete and total stop, and I had to, and I will tap and hold, take myself the rest of the way to the platform because I stopped out on the zip line. So, uh, while it looks from the photo like I'm going away, when you tap and hold to activate that live photo, you can see that I'm actually coming toward the camera.
(00:37:57):
And what I can do is in the top left corner where I've got the, uh, live photo icon showing, oh, this was a live photo that was taken. Um, if I tap on that, I have some options. There's loop. And so with a live photo loop, it will just basically replay the live photo over and over again. And what's kind of cool is that, um, the, the platform will do its best as software we'll do its best to try and select what looks like the best animation. Uh, there's bounce, which will go forward and backward, and I think this one looks pretty cool. Um, so you can kind of see the animation play out. And then there's long exposure. And long exposure is more for photographs of something like water or perhaps a, um, a shot of, of a car or something else where it will take multiple frames from the video and sort of overlay them on top of each other so you get this nice movement effect.
(00:38:53):
Um, so it's very easy to, uh, create live photos. And then if at any time you don't want the live photo, I can just choose off at the bottom and that will turn off, as you might imagine the live photo feature, um, when I am sharing a photo, I tend to not like, uh, to share, whoops, live photo information. So when you, um, actually share a photo in the Photos app, you can at that point say, I don't want this to be shared as a live photo, and let me show how that works. I'm gonna switch away for a second so I can get this set up without, uh, giving away anyone's information. Um, so let's see. I will, uh, tap to select a photo that has live photo information, like the one that I showed before, and then now I can show the screen.
(00:39:44):
So here I have selected the live photo, uh, by tapping in the bottom left-hand, uh, corner or middle left-hand corner on the photos app. And then choosing this photo. And you'll see that as the photo is here in the photos or rather in the Messages app. And I'm ready to send it in the top corner. The top left corner of that photo there is, uh, a white circle with blue circles inside of it. That is the icon for live photos. So what I can do is tap on the photo and then, uh, in the top left I tap on live. That turns off the live photo I tap done. And now that photo will be sent without live photo and you can actually just, uh, even without having to go big, it's just easier to to view it if you do it that way. But while the photo is in the message, I can just tap in the top left corner on that icon for live photo. And when you see it grayed out with a slash through it, that means no, I will not send along that live photo information. So you have the ability to, uh, then, uh, keep your live photo as it is in the photo library for yourself, but if you're not wanting to share that with, uh, the person that you're sending the photo to, very easy to then make that adjustment. Alright, yeah.
Rosemary Orchard (00:40:58):
Um, I just wanted to mention go ahead. Related to that, Micah, if you're trying to share a picture of multiple pictures from the photos app, and then you go and you just tap on say, Micah Sergeant like this, um, then it won't give you that option on the photo. What you have to do is in the share sheet, before you tap on the person that you want to send it to or the app that you want to share it, send it to, you need to turn on the live option in the top left of that picture before you share it. Um, and that's how you can do that from photos or any other photo picker.
Mikah Sargent (00:41:27):
Nice. Um, any last tips you wanna share, uh, before we move on with the rest of the show?
Rosemary Orchard (00:41:35):
Well, there is actually one thing I wanted to mention, which is if you make edits to a photo, so say for example, I've got this picture of a Sea Lion statue from San Francisco, um, and I make some edits now, I've just used the magic wand here, um, to, to do some edits. I'm, I'm not really gonna keep these, um, but then I tap done, um, and it saves those edits. Then what I can actually do is I can actually copy these edits and then I can paste them onto another picture. And this is really useful if you've got something and maybe, um, you know, you, you really wish, um, that you, you you had a, you know, a changed your camera settings or there was an extra light in the room at the time. And so you make a bunch of edits to a photo and you go, right, this is great. Then you realize you've got 20 pictures that you need to do this to. This isn't Photoshop's batch editing, but it, it comes kind of close. Um, and I believe if we tap on a few more, then I should even be able to paste edits onto both of those items, which means that they'll have the same edits apply to them right there, which is really useful. Um, so yeah, I just wanted to mention that to folks.
Mikah Sargent (00:42:38):
Alrighty, um, let's take another quick break and then we will come back with the news segment up Next, I wanna tell you about Cash Fly, who are bringing you this episode of iOS Today. Uh, customers, they're not gonna hang around for your contents to load. They're not gonna wait for the ability to purchase the product, so don't give them a reason to leave. You can dramatically increase your sites and apps speed over long distances for global audiences by using Cash Line With more than 3,500 clients in more than 80 countries around the world, organizations including TWiT, consistently use cash flow for scalability, for reliability, for unrivaled performance. Some markets are more challenging than others and content delivery costs very drastically. So why not partner with A C D N that knows what it takes to deliver content fast in global markets? And I love this is honest about the costs to get you there.
(00:43:42):
You can scale your content delivery in several emerging markets like South and Central America. Uh, these are actually predicted to be a significant emerging market in gaming and entertainment over the next five years. So hop on it now. Cash Fly has committed to navigating the complex government attitudes, the tariffs, the laws to understand this market and make sure that you are there and that it's operating properly. Uh, IP traffic in the Asia-Pacific area is growing year over year by 25%, and Australia is no exception. You know, we know that Australia has had, uh, issues with internet connection due to a lack of early investment in the region. So there's so, you know, it's a struggle, struggle bus, uh, to cover the entire Australian continent. But Cash Fly has a presence in Melbourne, in Perth, in Sydney, so it's not a problem for them. And then India, which is a market that cannot be ignored.
(00:44:38):
It's one of the world's fastest growing consumer economies. Mobile content consumption in many business operations tied to the West are happening in India by providing edge optimized content tailored to the mobile market and dedicated transfer and caching solutions. Cash Fly has your needs covered in the Indian market, so reach your audience anywhere in the world with Cash Fliess 50 plus locations across the globe. With that, you'll get ultra low latency video streaming. It's going to deliver video to more than a million concurrent users. Lightning fast gaming, which delivers downloads faster with zero lag glitches or outages, and no need to pay for service overlap ever again. You can get flexible month to month billing for as long as you need it, and discounts for fixed terms. Once you're happy, design your own contract when you switch to cash. How do we know that cash is so great?
(00:45:33):
Well, we at TWiTter have been using Cash Fly for more than a decade and wouldn't have it any other way. Building trusted CDN relationships since 1999, cash continues to hold the track record for high performing, ultra reliable content delivery. Cash Fly is the only CDN built for throughput, delivering rich media content up to 10 times faster than traditional delivery methods and 30% faster than other major CDNs. Learn how you can get your first month free@cashfly.com. That's c a C H E F L y.com. And we thank Cash Fly for sponsoring this week's episode of iOS today. Alrighty, back from the break. And now it is time to quickly talk about a few little news stories here. Uh, first and foremost, um, apple has said, Hey, look, we are going to use 100% recycled cobalt in our batteries by 2025. So Cobalt is one of those, uh, one of those materials that is kind of a, a big concern, um, not only from an environmental standpoint, but just from an availability standpoint.
(00:46:51):
And what, uh, apple is looking to do is make it so that it's possible that, uh, by 2025, which mind you is two years away, they want to make sure that the cobalts being used in the batteries, uh, are 100% recycled. Uh, the company also says that by 2025 magnets and Apple devices will use entirely recycled rare earth elements, and all Apple designed printed circuit boards will use 100% recycled tin soldering and 100% recycled gold plating. So essentially continue to make it so that the, uh, the, the new devices that it's making, the new components for the devices that it's making have as much recycled material as possible. Uh, I think this is great.
Rosemary Orchard (00:47:44):
Yeah, it really is, and it's worth checking out this article if you're at all curious to find out, you know, like what, what things are in your devices and so on and what is already there. You know, the, the iPhone 14 lineup is designed with a hundred percent recycled r rare earth elements for all of the magnets and, um, a hundred percent recycled tungston in the Taptic engine. So, you know, finding out things like that. And also there's just some very pretty pictures going through some of this, you know, of, um, you know, maybe not so much the Apple products, but certainly the various different, uh, kinds of materials and so on. So it's, you know, worth looking, looking at. And if you want some super minimalist wallpapers, then guess what? Free images. Yeah, you can click on a little download icon right there. <laugh>,
Mikah Sargent (00:48:21):
If you keep scrolling, um, there's this really cool photo of a, um, disassembly network where oh, daily they are. Yeah. Well, no, this, so this is like when human beings, I think it's right past that one Kevin. Um, they are showing someone, uh, well, I guess it's still keep going, <laugh>. Um, so it says overhead. There we go. Overhead projector based, augmented reality systems help Apples Recycling Partners disassemble MacBook and IPO iPad models by projecting video imagery directly onto their work surface. So you're seeing a person here, a human being who is dissembling a MacBook, and the way that they're doing it is they've got these different, uh, parts of their workspace and the, uh, screen or the, the projection is sort of, again, projecting down onto the workspace, and then the person knows where they're supposed to put each of the parts. And it's like, Hey, once you get the batteries out of this MacBook, please put those batteries into the sand. The sand is in the upper right hand corner, and then in the top left hand corner, there's a video playing showing each step of the process. This is super cool and I kind of want, um, that to be part of Apple's, uh, self-repair program. I think it'd be super cool if you have a, if you happen to have a projector, you could set this up and be able to, I
Rosemary Orchard (00:49:41):
Mean, maybe you just need Apple glasses. Let's, let's find out,
Mikah Sargent (00:49:44):
We want
Rosemary Orchard (00:49:44):
Wwdc. Who knows?
Mikah Sargent (00:49:46):
That's definitely in the future. Um, alright, up next, um, well actually you choose the next story and then I'll choose one more and then we'll move on to Shortcuts Corner.
Rosemary Orchard (00:49:56):
Cool. Well, I wanted to mention Apples launched an all new trade-in website. Um, and this is, they've done this just in time, uh, for Earth Day. Um, and so the trade-in website that you've, uh, the there is on the Apple website allows you to trade in various devices and recycle other devices as well. So if you've got a Lenovo, think about hanging around that thing's never gonna die, folks. Uh, but if you wanna get rid of it, don't, and you, you, you are not using it anymore. You can recycle it for free with Apple, um, uh, through their partner in whatever country you're in. Um, and, uh, yeah, if you've got an Apple product, then you can trade it in and get some vouchers and it's got a new upgrade and it looks a little bit shinier and prettier. Um, I'm always got a little, uh, guide or overview of, uh, you know, what's, what's changed and different, but it looks pretty handy and I've certainly recycled Apple devices there myself. Well, you might get more money doing it, uh, somewhere else, um, or selling it on eBay or similar. You then have to deal with whatever other company is involved or random people on eBay. Uh, doesn't always go super well. So it's, uh, definitely worth, uh, checking out to see how much you can get for trade-in prices.
Mikah Sargent (00:51:05):
Nice. Um, and then the one that I'll mention is actually, uh, a relatively new story. So let me get the link into the show notes here. Um, the HomePod has a, well, apple has added a feature or launched a feature, uh, for HomePod and HomePod Mini, where you can now get a notification when your smoke alarm goes off. So, uh, we knew that the, your iPhone has features built into accessibility where, um, it, it's, there's sound recognition features, but we take our phones with us. And so by having, um, home pods at home that have a chip in it, that is, you know, regularly listening for the, hey, you know, who, uh, trigger phrase, then it could also listen for something like a standardized sound that comes from, uh, smoke detectors or those, those kinds of alarms. Carbon monoxide, you know, smoke detector. So with, um, the new HomePod, uh, you will be able to turn this, uh, feature on.
(00:52:15):
Now it's unclear to me, um, where you find this feature, uh, to actually turn on. Uh, right now the, the articles are just talking about how it is launching today and that you can enable it. Um, so I will probably have to get back to you, uh, perhaps next week on how you actually, uh, turn this feature on. If you do wanna turn it on on your iPhone, um, or iPad, any iOS device, uh, you go into settings, accessibility and sound recognition. There you will see the option to listen for all sorts of different sounds. Uh, it seems like the HomePod is specifically going to be focused on smoke and carbon monoxide detectors. So if you are away from home and the smoke alarm goes off, now you can at least be notified that that is taking place, uh, instead of having to, uh, buy a special smoke detector that is connected to the internet. So, uh, yeah, I think that's great. Yeah.
Rosemary Orchard (00:53:14):
Yeah. Alright. So I, I've just been having a, a quick look in the home app, uh, under accessibility settings. There's nothing here yet from my HomePod, uh, but there are accessibility settings where you can disable touch, um, uh, accommodations or enable touch accommodations and automatically adjust Siri volume. So, fingers crossed, still show up there and we can report back next week.
Mikah Sargent (00:53:34):
Yes. And let us move on to Shortcuts Corner. Welcome to Shortcuts Corner, the part of the show where you write in with your shortcuts corner requests and Rosemary Orchard, the shortcuts expert, provides a response. We're kicking things off with a reminder from Rosemary.
Rosemary Orchard (00:54:01):
Yeah. So if you have made a shortcut, it doesn't matter if it's one action or a hundred actions. If it is a shortcut that improves your life and you would like to share it with the world, then the good news is you have an extended deadline to do so to the end of the week. The 21st of, um, April at 5:00 PM Eastern Time USA is when automation April's shortcuts contest on mac stories.net will close. We'll pull link to that in the show notes. But, uh, I am one of the judges. You will definitely get a bonus point or two from me if you are an Iowas Today listener. And I somehow magically <laugh> infer this information from you. Um, but uh, yes, if you have a shortcut that you would like to share with the world, then you should, uh, check that out. And there is also, uh, a little stream for the Club Max Stories members tomorrow, which I'm taking part in as well. So that should be good fun.
Mikah Sargent (00:54:53):
Nice. I love that. Um, I am looking forward to seeing that live stream. Alright, uh, Peter has written in, I really enjoy your show. Thank you for all the effort. I am all in on Apple products. I own an iPhone 14 Pro Max Apple Watch, series eight AirPods Pro two Apple tb, 4K 128 K with ethernet, two home pods. Uh, version one, an iPad, fifth Generation, a MacBook Pro 2021 M one with one terabyte of storage and 16 gigabytes of ram. My family owns AirPods, MacBook Air 2022 with M two and iPhones as well. I am a tech guy and previously a programmer. Many moons ago I have written some simplistic shortcuts. I would love to take a class or classes on shortcuts from the basics to the complex so I can be like Rosemary or Matthew Cassin, can you direct me to such courses, YouTube videos, et cetera. And this comes from Peter in Long Eye, long Island, New York.
Rosemary Orchard (00:55:49):
Yeah. So thanks for writing in Peter. Um, and um, so the first thing I've gotta recommend is Apple has a shortcuts guide on their website. Um, so if you haven't already looked at that, which I'm, I'm guessing you probably have, if, if you were a tech guy, you, you should know to check the documentation. It's got some interesting, uh, things in there which are worth knowing about, but it doesn't really give you, you know, the nitty gritty tutorial stuff that you're after. Um, so I've got two recommendations for you, one of which is very self-serving because it's my own book, take Control of Shortcuts, um, which is part of the, the Take Control, um, you series of books. Um, and, uh, yep, it, it covers shortcuts. There's an awful lot of examples in there, including step-by-step instructions on exactly how to build shortcuts, um, uh, with exact examples of this is what kind of thing you're doing here and so on and so forth.
(00:56:39):
The other recommendation I have for you is my co-host over at Automators has field Guides. Now he has two field guides for shortcuts. He's got one for shortcuts for Mac and a Gen General Shortcuts Guide, which is iOS and iPhone, um, iOS and iPad OS specific. Um, so those are two, uh, options as well. Those are video-based rather than, um, you know, uh, so whichever works for you would probably be, uh, better. Um, but yeah, try those. Other than that, uh, Mac Stories has automation April coming up. There's a lot of great shortcuts available to download from Mac Stories themselves. Um, so you know, you can download some of those examples. Take them apart, break them, put them back together, and of course check out the automation April results when they are voted for, um, to see, you know, if there's anything there that you wanna steal from.
Mikah Sargent (00:57:32):
Alrighty, uh, then let's go to Matthew who writes in. Hello Micah and Rosemary. Love watching your shows and have been watching from the early episodes of iPad today. And feel this is the best, all the best version of the show yet. Thanks Matthew. Um, I am using focus filters to turn off the always on display for some of my focus modes. This works as expected, but when that focus mode has switched off, the always on display stays off too. I have noticed this behavior with the Safari filter on which tabs to show as, oh, um, I've noticed this behavior with a Safari filter on which tabs to show, as well as, excuse me, as well, with the last focus filter being set, still being present when switching out of my focus mode and just back to default or the quote unquote unfocused mode. Is there a trick to get the focus filters to revert back to what they were beforehand?
(00:58:22):
Okay, this is interesting cause I've had a similar problem. I've created a shortcut to run when the focus mode is set on or off that handles the always on display for now, but seems like I must be missing something obvious as to why it wouldn't revert to normal operation afterwards. Thank you for your advice, Matthew. I wanna quickly mention the problem that I was experiencing is I had set up a, um, for my focus modes, it was a filter for Fantastical. So I would, when my work focus mode was turned on, it would turn on the, uh, a specific calendar set that was my TWiT calendars in fantastical. But when the focus mode got turned off, it was not communicating with Fantastical to let it know that that focus mode had been turned off. So the calendars were getting stuck in TWiT mode and I ended up having to turn it off.
(00:59:12):
It seemed like it was just a bug, not something that, you know, because it should have just worked on its own because I wasn't using shortcuts or anything like that. I was just the setting in focus modes that says when this focus mode is on use this filter, and when this focus mode is off, then I don't want to use this filter anymore. And yet. So, um, Matthew, I think I've experienced something similar, but I am curious to hear Rosemary as a whole, how you deal with, uh, especially the always on display, um, to automate that.
Rosemary Orchard (00:59:42):
Yeah, so, um, just to be sure, I wanna walk through how you should set this up. If you want things like the always on display and stuff, um, set up. So under settings focus, um, pick your focus mode. I'm go choose the podcasting focus mode cuz that's the one I'm in right now. Um, and then scroll down. There's options before that where you can allow notifications from people, certain apps with other options to, to hide notification badges, show things on the lock screen, et cetera. Um, there's a schedule that you can set up. You can even choose a specific watch face if you wanted to. So I can have this watch face chosen. Very nice. Um, and then you can add other filters. So I have two, I've got messages filtering by my people list and setting my appearance to light mode. Um, but the other things that you can do is add, um, more filters such as app filters, including Micah's example of Fantastic l um, and, um, safari.
(01:00:33):
And this always on display where you can turn off your always on display if you wanted to. Now this should work, um, and if it isn't, um, you can delete this filter, um, by tapping on it. Um, uh, or you can disable the filter if you temporarily don't want that filter enabled. I'm actually gonna delete that filter cause I do want my always on display on, um, and I am gonna suggest the good old have you tried turning it off and turning it back on again. Um, if you haven't rebooted your iPhone in a while or you've only rebooted while installing updates, it's definitely worth trying to do that. Um, the other thing I would recommend is go into shortcuts and go into your automations tab. Just have a look through your personal automations and just see what's going on because I'm pretty certain I just spotted something because in my podcasting focus mode, you'll see here, Micah, I've got set appearance to light.
(01:01:24):
And now if I go into my automation for when my podcasting focus mode turns on, oh, look, look at that, I'm turning my, I'm turning my appearance light. I probably don't wanna do that, so I'm actually going to go back. Um, and you could disable an automation, but also if you swipe on it, then you can delete it. And I, I just want people to make sure that they aren't accidentally creating an automation for their display, um, or something, um, to make sure to, to change that. And also doing it in focus filters or in, or trying to do it instead of focus filters. Now, I don't believe there is an option for, you're always on display in, um, the, um, settings. Uh, but I could be mistaken that could be. It is, it's a new one set always on display. Make sure you're not running this action as an automation or a shortcut somewhere, um, as well, because if you change that whilst you're in the focus mode, then it's not gonna flip it back.
(01:02:17):
Um, when, when you exit the focus mode. The other thing to check is make sure you're not going from one focus mode to another focus mode directly. Um, that has another, um, uh, always on display filter or something, uh, in there. Um, and if you do, then maybe just try disabling those and rebooting your device and coming back to it later. It could just be that something's conflicting there, but I personally haven't had this issue with the always on display, um, or the dimmed lock screen. But, um, I, I believe that other people have. So fingers crossed that gets fixed. If it's a third party app, such as Micah's example of Fantastic l definitely make sure that's up to date. You can tap and hold on the app store icon and update all. Um, but yeah, there's, um, not a huge amount that we can do other than try turning things off and turning them on again and watching when your focus mode turns off and seeing do you get a little notification from shortcuts saying that an automation failed to run. Because if you do, something's going wrong somewhere and you could probably check that out and fix it.
Mikah Sargent (01:03:18):
All right. And then last but not least, uh, from Joe, Joe writes, and, hi, Mike and Rosemary, listen to your show every week and very much appreciate all the work that you do. Thank you for it. I use Siri shortcuts to gather bits of texts, which I want to paste into obsidian. Uh, for folks who don't know, obsidian is a sort of text management app. Um, it's a lot more complex than that, but, uh, based understanding it collects text. Uh, when I come to the end of the shortcut, I can't figure out how to get it to paste in iOS on the Mac. I put the shortcut into a keyboard maestro macro, which ends with a paste action. That works great, but I can't figure out how to get the gathered text to paste automatically in iOS or iPad. Os am I stuck with a command V or a tap and paste? It's on the clipboard and I just can't get it out automatically. Thanks so much for all you do, Joe in Pennsylvania. Okay, this is interesting. Um, is there a way to put the text into obsidian in the background or if I have obsidian pop up in the foreground, then can it paste automatically after it opens obsidian or does it just have to wait for me to whoop and paste the text?
Rosemary Orchard (01:04:28):
Well, uh, this is a tricky one because, um, pasting on iOS is not something that shortcuts can do. Um, and it as, as, uh, Joe's noticed, it's not something you can do on Makos either. I'm just, uh, making sure that I've got the, uh, latest version of obsidian here on my, um, iPhone. Um, and so I'm here in obsidian. I've got obsidian installed. Cool. I go back to shortcuts. I tap on apps and I go to obsidian. And, um, uh, Mike, are you seeing what I'm seeing? Obsidian isn't here. Um, don't suspect
(01:05:00):
The whatever, uh, Joe is doing, he's using good old fashioned URL schemes. So URL schemes are, um, a kind of url. So just like you go to hgtp co or HD TPSs co slash slash TWiT dot TVB slash iOS to get to the iOS today, um, page with every episode that's got all of our links in, um, there are different kinds of URLs called URL schemes, um, which can open specific applications, for example. Or, um, there's even callback URLs which can say, Hey, go to this application, do this thing. If it goes right, if everything's good, then I want you to go over here and do this. If it doesn't go right, I want you to come back here and, and tell me that it it went wrong, for example. Well, what we're actually gonna do is, I'm, I'm just gonna grab a U R L action because I suspect that, uh, Joe is using U R L schemes, but what we actually need is a special kind of u URL scheme for obsidian where maybe you just wanna append to a specific note because if you just wanna append to a specific note, then there is an obsidian URL scheme URL for this.
(01:06:07):
So what we need to do is we'll need the, the URL scheme for this, and then, um, we'll need to open the URL or do the callback url. Now, if you want to open obsidian, paste the text and then stay in obsidian, you want the open URLs action. If you want to open obsidian, paste the text and then go back to shortcuts. You'll want the e the callback url, which is open X callback url. Okay? So depending on which one, um, you want, um, those are the two options and you'll need to change, um, the, the default example for the, um, append, um, information. You'll need to change some vault name to the name of your vault. So I could call it super secret project, for example. I'll just type in super secret for now. Um, and then, um, the file name is gonna be whatever the title of some note is. Um, and I'm just gonna leave that as is. I'm not actually going to paste. Um, but then what we can do is we can add a little bit to this, um, so that we can, uh, you know, make, make some more out of it. So fingers crossed, um, I'll, I'll make sure that the link to, um, the obsidian, uh, u URL scheme docs ends up in the show notes so that you can use this. Um, but hopefully that will actually help everyone else.
Mikah Sargent (01:07:18):
That is lovely. Alright, we've got a quick feedback and then we will move right along to our app caps. The feedback comes from Michael a, uh, who writes in, I assume about last week's episode where we talked about what is in our bags. And Michael says this week was a hugely helpful episode. I appreciate all the advice and the gizmos highlighted, highlighted. Michael, uh, Michael, thank you. I'm glad to hear that, uh, it was helpful and that you got some inspiration maybe for some gadgets you wanted to pick up, uh, and sort of seeing how we make use of ours. Uh, Rosemary inspired me to, uh, check out slick wraps stuff and I actually, I don't have it with me right now, but I got a really cool, um, wrap for my, my MacBook Air, uh, that has this sort of retro look. So, uh, be on the lookout for that on the next ask the Tech guys, cuz I use my MacBook Air, uh, for that show and it's easy to see. But, um, yeah, there was some great gadgets mentioned, so please go check out last week's episode, uh, to learn about what Rosemary and I have in our bags and, um, maybe even what bags <laugh> we, we have as well.
Rosemary Orchard (01:08:31):
Mm-hmm.
Mikah Sargent (01:08:31):
<affirmative>, uh, alright, moving right along. I can hear the next set of music. It's time for APP caps.
(01:08:51):
This Is the part of the show where we place caps or other items, a top hour heads to honor our app and or gadget picks of the week. These are the apps or gadgets we are using now or have been using for some time that we think are great. And in honor of set apps and gadgets, we, again, place things on our heads to say, you know what, you're awesome. So, Rosemary Orchard, tell us about the cap at top of your head and then tell us about your app, um, or gadget Pick of the week.
Rosemary Orchard (01:09:22):
Well, the hat at top of my head is a straw boater with a black, uh, sort of cotton band around it. It's nothing particularly fancy, but I thought, you know what? It's getting a little summery here. I'm being optimistic. I'd like it to be summery here. It's cloudy outside. Um, but, you know, whatever, it's, it's all fine, right? Um, you know, this is, this is what we're here for. We're here for the summer, we're here for the sun, and we're here for keep talking and nobody explodes. Uh, at least that's the idea. Um, and if, uh, EAM will cooperate, then I can even show you what this looks like. So keep talking and Nobody Explodes is a game for iOS, um, and various other platforms. It's available on, uh, a lot of different things. Um, but, uh, it's recently become available on mobile. And so this is great because you can install it, for example, I have it here, uh, on my iPad, which is where I was gonna show it to you.
(01:10:13):
But, uh, EAM is currently the thinking that my iPad is invisible. Um, but I can pop it up on my iPhone. Um, and, um, it is a, essentially a virtual bulb. Uh, now it doesn't look super great on my iPhone on, on screen. Um, if I just, uh, quickly, uh, unlock my, uh, rotation lock and then maybe if I, uh, switch over to pretending that this is an iPad and show everybody, there we go. Um, so this, it's a local game and the idea is that you play it with a couple of people and, um, somebody has your iPhone or iPad and it has a bomb on it, and they have to describe to you what they are seeing. Um, and then you and maybe some other friends if you want, or maybe just one person, uh, does this. So you need two or more people, um, can look at the manual, which I have here in person.
(01:11:03):
Um, and you have to diffuse the bomb. Now I have this printed, obviously I have an iPad, um, and you're probably going, rose, like, have you heard of this Apple Books? Um, there's 23 pages in here, and time is of the essence when it comes to bond, uh, diffusion folks. So it's actually quite nice to have this as a printed copy, maybe even a couple of printed copies, because then if you've got multiple people, you can kind of spread stuff out on the floor or table in front of you and have like, people like have a a column of focus where they're looking in. So when somebody describes something that they're seeing, you can figure out, oh, okay, it looks like one of these things. So for example, um, if there are multiple wires, oh, on the subject of wires, that's gonna be the page, or there's some symbols that we need to figure out with eyes in them.
(01:11:46):
Okay, well, I, I see I seem to have something to do with that or memory. Okay, I've got a memory thing that's, that's cool, I can deal with that. So yeah, this is a great game. It's available now on iPhone, iPad, and Mac Os as well. It's not officially supported, um, on the Mac when you install it, but it works just fine in my experience. Um, and it's available for 9 99 from the app store. So you know what's not to love other than the fact that, you know, you've now got a bomb on your iPhone. And also, uh, the bomb manual is at a website that does seem like it's gonna get you put on a lot of lists. Um, I promise you it shouldn't do, but you can always go to keep talking game.com and it has a link to the manual there so you're not googling for bombed if you, um, uh, bomb manuals or something like that, getting yourself on any dodgy watch lists. And, uh, yeah, please remember virtual bombs, no physical bombs,
Mikah Sargent (01:12:35):
<laugh>. Nice. Um, alright, I am wearing a sort of lavender, uh, Paisley bandana, a top my head today in honor of my app, or yeah, my app pick of the week and the, my app pick of the week is called pt. The AI Assistant, uh, PT is essentially a way to access, um, chat G p T on your phone. So here you can, there, there are multiple ways to sort of go about using this app. Um, if you have, uh, access to the chat, G P T A P I, then in the settings you can, uh, drop in your, um, your a p i key and then it will use the chat G P T A P I <laugh>, which those are a lot of letters. Um, but if you don't, you can subscribe I with an in-app purchase to basically pay for a, uh, access to the a for the app.
(01:13:35):
But here I could type in anything. So for example, I could say, um, give me a caption for an Instagram photo featuring, uh, my podcast co-host Rosemary Orchard, uh, who is joining me in person after recording an episode of our show, i o s today, a podcast about Apple, uh, devices, accessories, et cetera. And I have, uh, my a p i key dropped in. And so then it will, uh, drop in the, uh, the, the, it'll send the information off to chat G P T, and then my, the response comes back. And if you have, um, if you have voice turned on, it will actually read it out loud. It's a little bit like carrot in that way. And here is what it came up with, how sweet it is to record in person exclamation points, and then it has a mic emoji and a starry eye emoji.
(01:15:00):
So happy to have my amazing co-host at Rosemary Orchard here with me today for another episode of hashtag iOS today, an apple emoji and a a phone emoji. And then hashtag Podcasting Life, hashtag Apple Podcasts hashtag team podcast. Uh, from here I can easily share that text. So this is how I could copy the text and paste it somewhere else or send it off if I wanted to. Um, I can, uh, choose to start talking, meaning that it will actually read out the text to me. Um, I can reply if I wanted to, to say, oh, I didn't like that. Give me another one. Um, or I can, uh, choose finish, in which case it sort of ends this current, uh, conversation and starts fresh. So if you were looking for a way to either A, not have to pay directly for chat, g p T, um, and u you know, using the a p i, then this is one way to make use of chat G p t, uh, from your iPhone, but also just those sort of extra features that make it possible to interact with it without needing to, um, actually go into, uh, chat.openai.com.
(01:16:10):
Uh, this started out as an Apple Watch app where you would essentially speak, uh, and ask for answers. So it was a little bit like creating Siri, but instead of using Siri, it's using, uh, Chad g p t as the AI assistant. And then the developer added an actual, uh, iOS app after the fact to give you more options and opportunities to make use of it. So, uh, yeah, I just wanted to mention pd, uh, which is, I, I, I'll be honest, I'm not using it all that often because, um, if it's using the A p I, uh, then it's probably pulling from 3.5, uh, whereas I do have a, uh, plus subscription that ha for for chat G P T, which has, uh, 4.0 and 4.0 is a lot better I've found. So I do like to use that. But, um, yeah, it's a fun way, actually, I forgot no, the a p I does support four.
(01:17:09):
You can make use of that. Um, I, I guess I find it, uh, to be a bit of a veneer in between a system that I'm already using, but I think this is great for someone who maybe is not as familiar with chat G P T and how to make use of that, or who just wants a dedicated app for doing that itself. So that is pd. Uh, and that brings us to the end of this episode of iOS Today. Uh, thank you for tuning in. I hope that you got some new tips and tricks, or were reminded of some things that you can do in the Photos app. Uh, if you have questions, concerns, uh, feedback, et cetera, you can send that to iOS today@twit.tv. Um, consider tuning in live to watch us record the show, uh, every Tuesday round about 9:00 AM Pacific by going to twit.tv/live.
(01:17:57):
There you will see the different places we're streaming the show. Um, but the best way to get the show is by subscribing or following, which you can do by going to twit.tv/ios. There you will find links to subscribe to audio or subscribe to video and be able to, uh, access the show on your streaming or viewing platform of choice, apple Podcast, Google Podcast, Spotify, YouTube, et cetera. We try to be in all of those places and, uh, that way you can get the show. Um, so yes, go to TWiT tv slash iOS for that. Uh, if you would like to get every single Twitch show ad free, including this very show, uh, consider joining the club at TWiT tv slash club TWiT when you join the club. Starting at $7 a month or $84 a year, uh, you will get every single TWiT show with no ads.
(01:18:45):
It's just the content because you, in effect, are sponsoring the show. You are the supporter of the show. Uh, you also got access to the TWiT plus bonus feed that has extra stuff you won't find anywhere else behind the scenes before the show, after the show special, um, events, all sorts of fun stuff gets published in the TWiT plus bonus feed and access to the members only Discord server. A fun place to go to chat with your fellow club TWiT members, and also those of us here at TWiT. Um, we regularly receive feedback and questions there. Um, I, there was someone this morning who said, you know, I don't really like, um, the the app cap, uh, the, the sort of cap part of the app cap. Um, I think that the show or the, the end of the show could do without that. And so I was able to explain to them that this is just kind of a tradition we've had.
(01:19:30):
I, Sarah Lane and, uh, Leo, uh, introduced the app cap, which is sort of, again, wearing something on our heads as we're talking about the, the, the app or gadget of choice. So, uh, that was a great little moment to get to kind of talk about the history of the show and why we, uh, do this as part of, of, of the program. Um, who knows, maybe in the future it'll be app, uh, app Face Paint. I know Rosemary's pretty good at that, but my point is, please consider joining the club, uh, starting at $7 a month, $84 a year. You can also, um, check out some great programs that are only available to Club TWiT members. Has the Untitled Linux Show, which is a show all about Linux with incredibly gorgeous artwork. I love the Untitled Linux Show artwork. You also get access to, uh, Paul T's Hands on Windows program, which is a program, uh, where Paul Throt goes through Windows Tips and Tricks, teaches you everything you need to know there, and Hands on Mac, which is my, uh, show all about, uh, apple devices.
(01:20:36):
So it's, it's sort of a, a focused and specific, um, discussion about various features on Mac os, iOS, um, iPad os, et cetera. Um, so please consider checking those out. And then the newly Relaunched Home Theater Geeks program from Scott Wilkinson is also there. So some really great shows that are available to you. Club TWiT members, thank you to those of you who are, uh, supporting us that way. And also, uh, a huge thank you to those of you who are considering joining the club at TWiT tv slash club twi Rosemary Orchard. Folks wanna follow you online and check out all your great work. Where should they go to do so? Whew.
Rosemary Orchard (01:21:17):
Uh, the best place to go is rosemary orchard.com, which has links to the places I do things around the internet, podcast, books, apps, et cetera. Um, and uh, down at the bottom, there's links to the social media where you can find me at Rosemary Snail it social arm, Macedon. Um, and uh, I'm also on Instagram, though now. I'm not traveling, I'm not posting there as much, so maybe you'll just have to wait for another trip. What about you, Micah? Where can folks find you?
Mikah Sargent (01:21:40):
You can find me at Micah Sergeant on many a social media network. Or you can do Chi wawa.coffee, that's c h i h o a h o a.coffee, where I've got links to the places I'm most active online. Uh, thank you so much for your time. Thank you for tuning in. Thank you for subscribing. Thank you for joining the club. Thank you. Thank you, thank you. And we will be back next week with another episode of iOS Today. Goodbye.
Jason Howell V.O. (01:22:05):
I'm Jason Howell. What do you get your favorite geek who already has everything? Well, I know just the thing. It's a Club TWiT gift subscription. Of course, TWiT podcasts keep them informed and entertained with the most relevant tech news and podcasts available. And with a Club TWiT subscription, they get even more. They get access to all of our podcast ad free, the members only Discord exclusive outtakes behind the scenes and special content and exclusive shows like HandsOn Mac, hands on Windows, and the Untitled Linux Show. You can purchase your geek's gift at TWI tv slash club Quit. And they're gonna thank you every day for it.